How to Choose and Install the Perfect Garage Door Opener
- COMMERCIAL GARAGE DOOR REPAIR
- GARAGE DOOR OPENER INSTALLATION
- GARAGE DOOR SPRING REPAIR
- SAME-DAY GARAGE DOOR REPAIR
- CUSTOM GARAGE DOOR
- GARAGE DOOR OPENER REPAIR
- GARAGE DOOR TRACK REPAIR
- GARAGE DOOR CABLE REPAIR
- GARAGE DOOR PANEL REPAIR
- LOCAL GARAGE DOOR REPAIR
- GARAGE DOOR REPLACEMENT
- NOISY GARAGE DOOR FIX
- GATE REPAIR
- GARAGE DOOR INSTALLATION
- GARAGE DOOR SECTION REPLACEMENT
- OVERHEAD GARAGE DOOR REPAIR

How to Choose and Install the Perfect Garage Door Opener
Choosing the right garage door opener can seem tricky, but it doesn’t have to be. Whether you’re refreshing an old system or installing one for the first time, getting it right can save you time and hassle. From selecting the best fit for your needs to smooth garage door opener installation, we’ve got you covered.
What Makes a Great Garage Door Opener?
Before jumping into installation, it’s important to choose a opener that delivers on functionality and convenience.
1. Consider the Type of Drive
Garage door openers typically come in three main drive types, each with its pros and cons.
- Chain-Drive Openers are robust, budget-friendly, and ideal for heavy doors. However, they can be noisy.
- Belt-Drive Openers operate quietly and are perfect for garages attached to living spaces. They’re a bit pricier but worth it if noise is a concern.
- Screw-Drive Openers require less maintenance and are ideal for moderate climates but may struggle in extreme temperatures.
2. Think About Motor Power
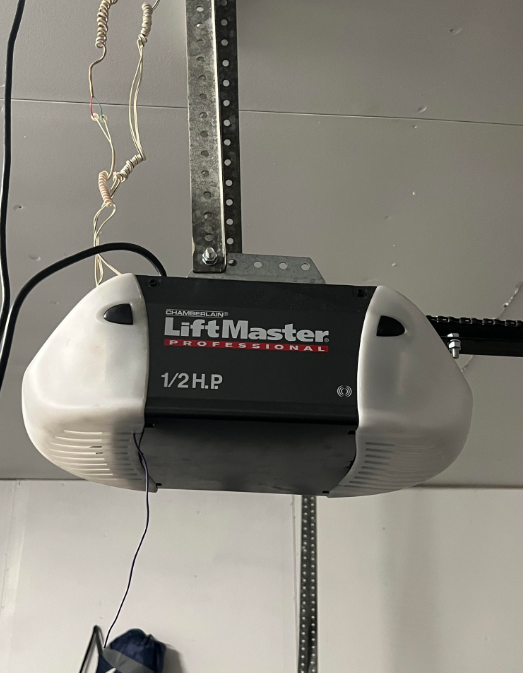
Garage doors come in various weights, so it’s critical to match the motor’s power to your door’s size. For example, single doors work fine with 1/2 HP motors, while heavier double doors may need at least 3/4 HP.
3. Look for Bonus Features
Modern garage door openers often come with additional conveniences like Wi-Fi compatibility, battery backup, or motion-triggered lights. If smart home integration matters to you, investing in one of these is a fantastic idea.
How to Install a Garage Door Opener
Once you’ve picked the right opener, the next step is the installation process. While it might seem daunting, a little preparation can make garage door opener installation straightforward.
1. Gather Tools and Materials
Before you begin, ensure you have the following on hand:
- A power drill
- Screwdrivers
- Measuring tape
- Stepladder
- Level
Most garage door opener kits come with all necessary mounting brackets and screws, but always double-check.
2. Follow the Manufacturer’s Instructions
Garage door openers differ slightly depending on the brand. Always start by reviewing the manual carefully.
- Begin by mounting the opener to the garage ceiling, finding and securing it to a stable beam for support.
- Attach the motor to the rail assembly, ensuring it’s level to avoid operational issues.
- Install the safety sensors on either side of the door, just above floor level. These prevent the door from closing if something is in its way.
3. Test the System
Once everything is hooked up, give your opener a trial run. Test the remote control functionality, safety sensors, and manual operation to ensure everything is in working order.
Hire a Professional for Extra Peace of Mind
Garage door opener installation isn’t always a DIY project. If you’re unsure, it’s worth considering hiring a professional to handle it for you. Garage Door Supplier Columbus Ohio can ensure everything is securely installed and operating smoothly.
